Setting Up A Pottery Studio in an Apartment
Imagine this. You've been practicing pottery for a number of years. You just moved to a new place, cross-country, in a fourth floor unit of an apartment complex. There's no community studio around you in this new town, but fortunately you got a sweet deal on a second hand wheel off of Facebook Marketplace. And now you wonder, is it feasible to build a home studio in my small rental unit?
Contrary to what Reddit and social media will say, the answer to this question is YES, it is 100% possible and manageable. You just have to start. Of course, there are several things to keep in mind, but it really is no different from having a studio in a garage or a small shed.
The main things to think about are: where your pottery wheel will go, wastewater and cleaning, storage, and where or how you will fire.
Wheel Area
Where you set your wheel will depend on your space and your splash zone. If your floors are hardwood or vinyl, you can basically place your wheel anywhere. In my first apartment, I was in a one bedroom unit, and I dedicated a corner of my living room as the wheel area.
My second apartment was a two bedroom unit, but it was a bit more complicated because the second bedroom was entirely carpeted. If you're not aware, clay in carpet is not ideal. Fortunately, there's a number of ways to get around this. My solution was to set up temporary flooring with interlocking vinyl planks on top of 1/5" plywood. This small area (8 ft by 6 ft) was based on my throwing experience; it was large enough to catch any clay that flung from my wheel. This space doesn't have to look nice, so don't worry too much on how the vinyl planks look. The goal is to create an area that is easy to mop and protects the carpet underneath.
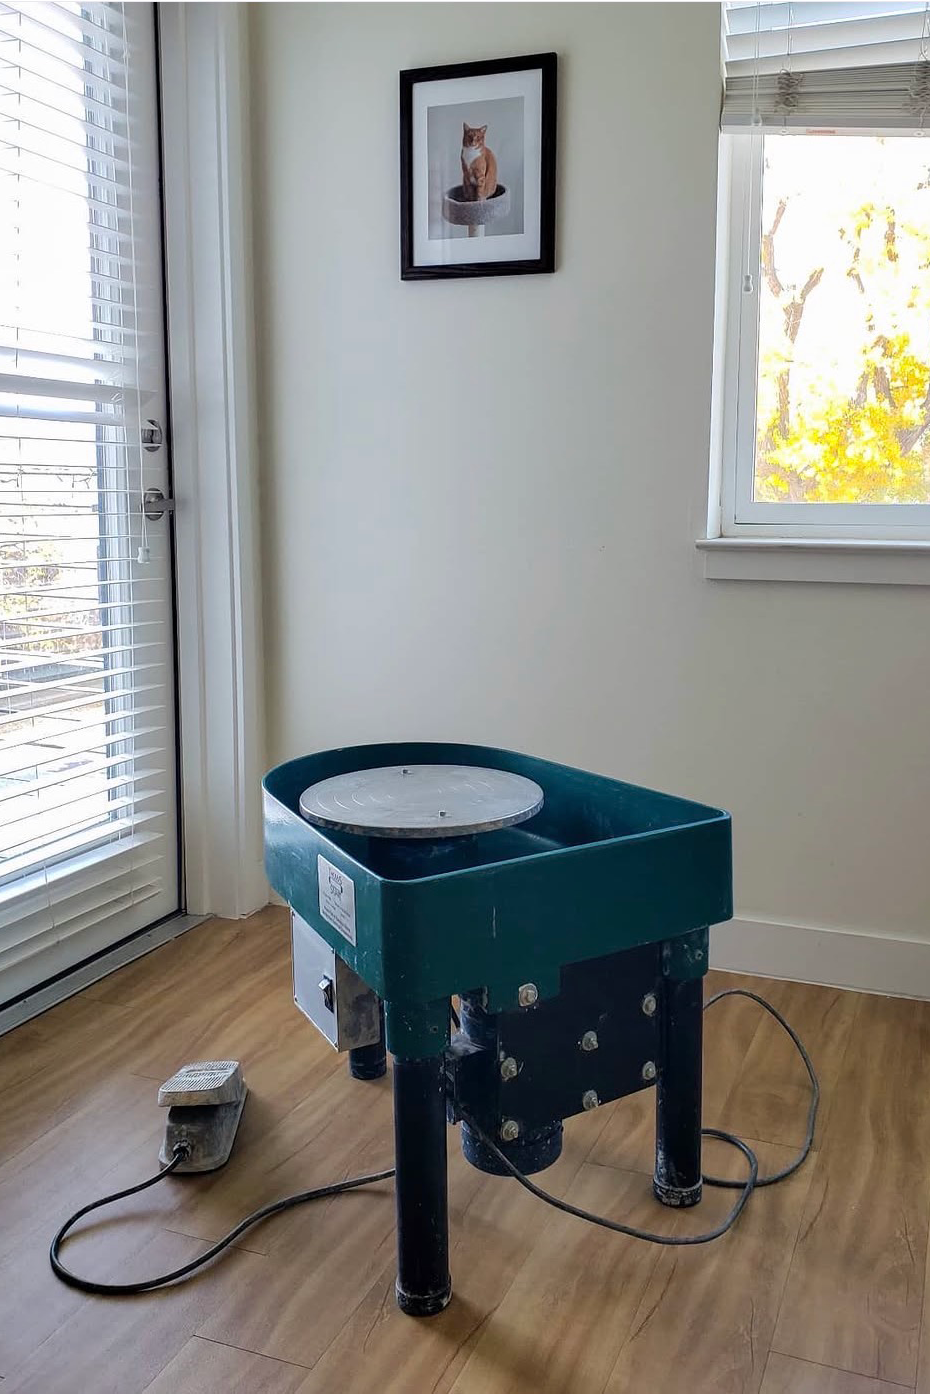
The set up in the first apartment, with the wheel in the corner of my living room.
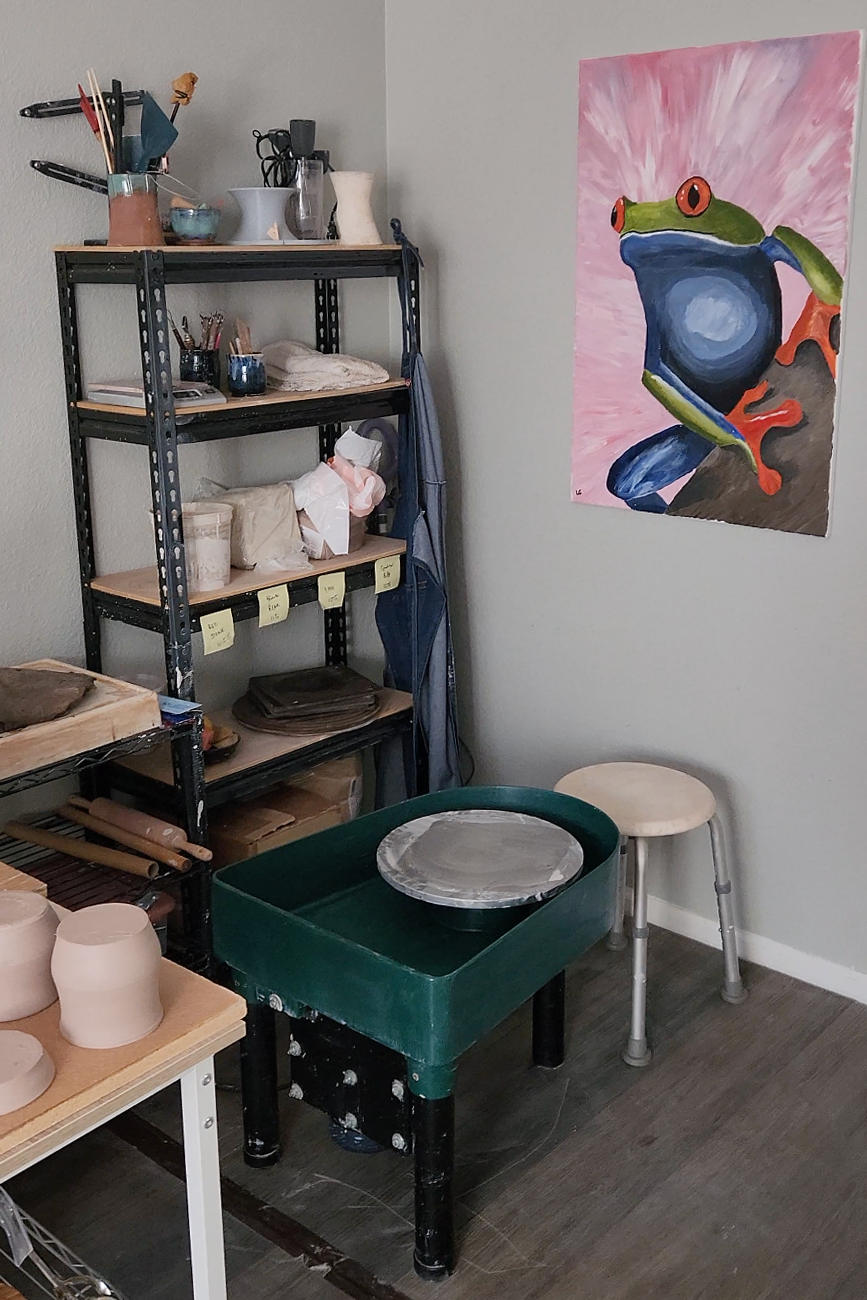
The set up in the second apartment, with the vinyl planks and plywood flooring over carpet.
Water Management
The next thing to think about is water disposal, specifically, where will your dirty clay water go? You should not directly dump your throwing water down the sink because the clay will eventually settle and cause blockages. Most community studios have clay traps installed on their sink, but in the case of home studios, this is not something that is handled automatically.
The solution to water management is the bucket system. This is where you have two or three buckets, one to two buckets filled with water for cleaning, and an empty bucket to dump your throwing water in. One of the buckets is used to wash off most of the clay from your tools, while the other is used as a second rinse for extra cleanliness (you could forgo this bucket if you want altogether). When the clay settles at the bottom, you can skim off the clean water on top and either reuse it, or get rid of it.
If you plan to have a reclaim area to recycle your clay (a plaster slab, for instance), you can recycle your throwing water as well. I had 2-gallon buckets for each clay body I used, and I would throw any scraps and water into their corresponding bucket. When a bucket got full, I would mix it all up with my drill, and spread it out to dry on the plaster slab.
Don't be too worried if some clay does go down the drain. As a general note, clay build up takes several years or more to really have an effect. Washing your apron and some towels here and there isn't going to be an issue. As long as you follow the bucket system, water management in a small studio should not be an issue (for any studio, really).
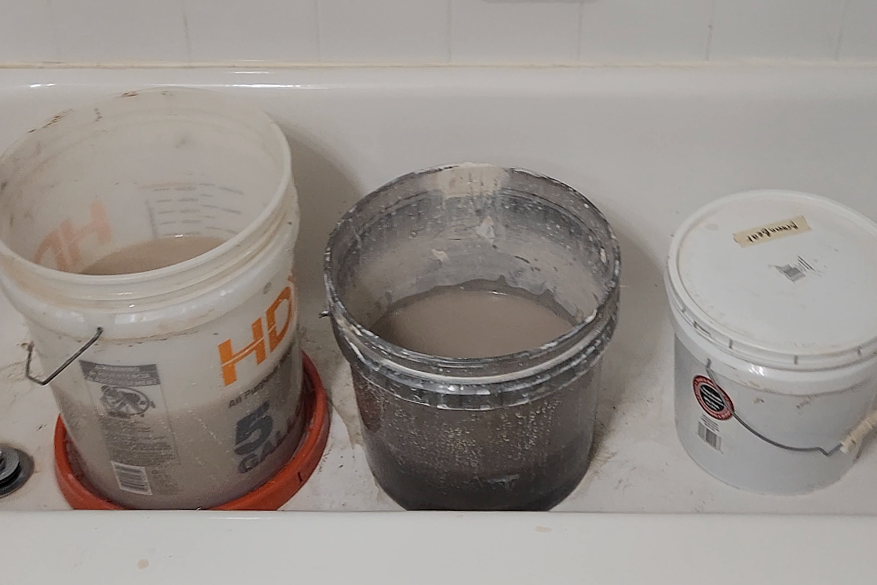
The bucket system lived in the bath tub connected to the second bedroom. Two buckets for cleaning, and the white bucket for reclaim.
Storage
When you're in a small space, shelves are the best way to manage storage. They can hold glazes, tools, works in progress, finished pieces, clay, the possibilities are endless. If you're feeling overwhelmed, start out with one shelf. My first shelf was a simple $50 four tiered, small industrial shelf from Lowe's. Facebook Marketplace or Craigslist is another great place to find other storage solutions like bins, carts, and tables. Just make sure they're sturdy enough to hold everything you need!
In my apartment studio, I had a large metal shelf that held my packing materials for shipping out pottery, finished work, eggshell foam in storage bins used to transport pieces to and from the local studio for firings, miscellaneous tools and commercial glazes, pieces that were ready to be fired, and finally six 2-gallon buckets of dipping glazes I mixed myself. I had all my raw materials stored in a big plastic storage bin. I won't talk about the specifics of glaze mixing, but buckets were always mixed outside on the apartment patio while wearing a P100 respirator.
Kiln Firing
For firing your pieces, you have two options.
The first, which I highly recommend, is finding a studio or a friend to fire your pieces for you. If a Google search is not turning anything up in your area, there's a great resource called Kiln Share. This website allows you to locate people in your area that are "renting" out their kiln. You can then contact the kiln owner and get more specifics such as firing temperature (Cone 5/6 or 10) and pricing.
In the case where there is nothing nearby, and local studios are not willing to fire outside work, the other option is to invest in a small kiln that runs on a 15 amp, 120 volt outlet, like the L&L Plug N Fire. This kiln can plug into a regular outlet. It's essentially a small oven (that goes to even higher temperatures!) so make sure it has enough breathing room on all sides, and not touching the floor directly. I do not own a kiln, so if you choose this route, make sure you're in touch with the manufacturer. I generally do not recommend this option because the size of the kiln is not worth its cost, but if there really is no other way, then do what you must
Nice to Haves
With the basics down, here are some other things that come to mind.
Wedging table: This can be as simple as a wooden board on a table held by clamps.
Plaster slab: For recycling clay
HEPA Air Filter: Helps with any floating clay particles. I'm not a production potter and I wet sponge and mop consistently, but I had the filter there anyways since I spent a lot of time in that room.
Bins for transporting fragile pieces to and from firings. Egg crate foam has worked well for me as padding.
And there you have it, a guide to get you started on building your first studio in your apartment. I hope you found this helpful, and wish you the best of luck on your ceramics journey!